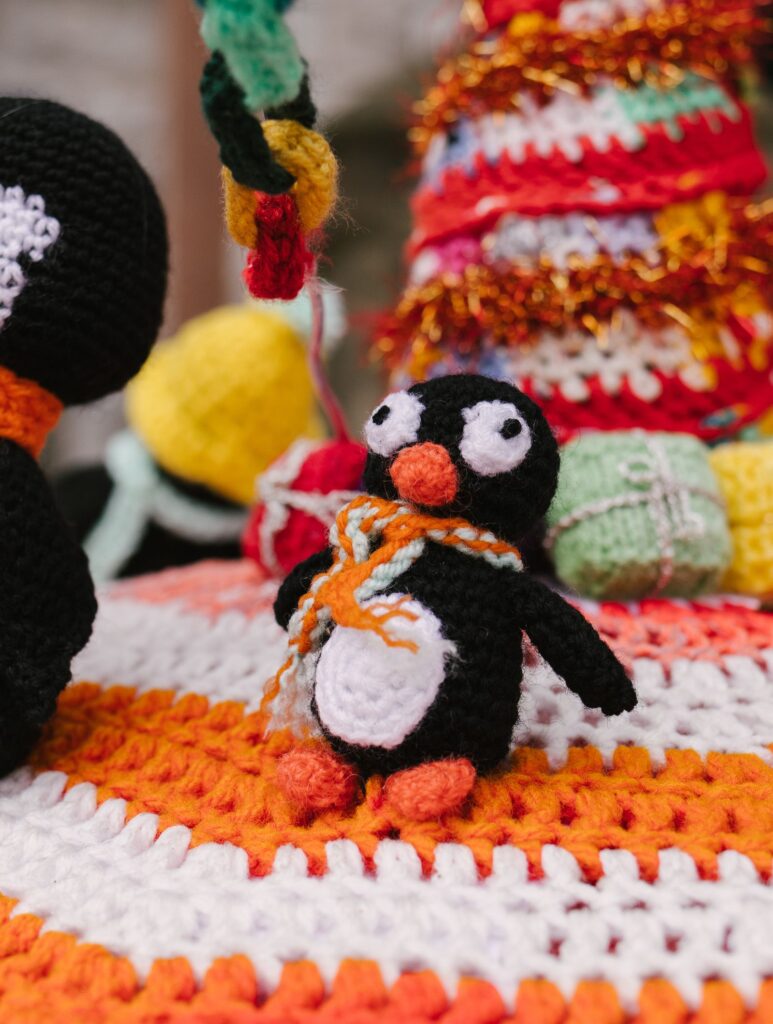
This round little penguin is pure kawaii: one chubby egg-shaped body, a white tummy, tiny flippers and orange feet. The head and body are worked in one piece, so there’s very little sewing, which makes it a great amigurumi for beginners.
He’s about 8 cm (3 in) tall and takes around 2 hours. Add the optional red beanie for a festive winter version, or leave it off and he’s cute all year round.
Materials
- Worsted weight (#4) yarn: black or navy (about 15 g), white (5 g), orange (scrap), red (5 g, optional hat)
- 3.5 mm (E/4) crochet hook
- 8 mm safety eyes (1 pair)
- Polyester fiberfill
- Pink floss or blush
- White pom-pom (optional, for the hat)
- Yarn needle, stitch marker
Finished size: about 8 cm (3 in) tall.
Abbreviations (US terms)
MR = magic ring · sc = single crochet · inc = 2 sc in the same stitch · dec = invisible decrease · sl st = slip stitch · ch = chain · BLO = back loop only · (…) x6 = repeat 6 times · (30) = stitches at the end of the round.
Work in continuous rounds and use a stitch marker.
Body (black or navy)
The body starts at the top of the head.
- R1: 6 sc in MR (6)
- R2: inc x6 (12)
- R3: (sc, inc) x6 (18)
- R4: (2 sc, inc) x6 (24)
- R5: (3 sc, inc) x6 (30)
- R6–R14: sc around (30) — 9 rounds
Insert the safety eyes between R8 and R9, with 5 stitches between them. Make sure the beginning of the round is at the back of the penguin.
- R15: (3 sc, dec) x6 (24)
- R16: (2 sc, dec) x6 (18). Start stuffing firmly.
- R17: (sc, dec) x6 (12)
- R18: dec x6 (6)
Fasten off and close the hole. Press the bottom gently so he sits upright.
Tummy (white)
The tummy is a flat oval.
- Ch 6.
- R1: sc in the 2nd ch from hook, sc in next 3 ch, 3 sc in the last ch. Continue on the other side of the chain: sc in next 3 ch, 2 sc in the last ch (12)
- R2: 2 sc in the first st, sc in next 3 sts, 2 sc in each of the next 3 sts, sc in next 3 sts, 2 sc in each of the last 2 sts (18)
- Sl st to the first stitch to join. Fasten off with a long tail.
Flippers (black, make 2)
- R1: 4 sc in MR (4)
- R2: (sc, inc) x2 (6)
- R3–R5: sc around (6)
Fasten off with a tail. Don’t stuff; flatten them for sewing.
Beak (orange)
- R1: 4 sc in MR (4)
- R2: (sc, inc) x2 (6)
Fasten off with a tail.
Feet (orange, make 2)
6 sc in MR. Don’t join. Pull the ring closed and fold the circle in half to make a little half-moon. Fasten off with a tail.
Winter beanie (red, optional)
- R1: 6 sc in MR (6)
- R2: inc x6 (12)
- R3: (sc, inc) x6 (18)
- R4: (2 sc, inc) x6 (24)
- R5–R7: sc around (24)
- R8: BLO sc around (24) — fold this round up for the cuff
- Sl st to join and fasten off. Sew a small white pom-pom on top.
Assembly
- Tummy: pin the oval on the front, from just under the eyes (around R10) down to R16. Sew it all around with small, even stitches.
- Beak: sew the beak between the eyes, slightly lower, with the opening facing the body.
- Flippers: sew one flipper on each side at R9–R10, angled slightly outward so he looks like he’s waving.
- Feet: sew the two feet to the bottom front, peeking out from under the tummy.
- Face: add pink cheeks just under the outer corner of each eye.
- Hat: place the beanie on top, tilted a little, and sew it on with a few stitches.
Tips
- Navy instead of black. Dark navy yarn photographs much better than black and shows the stitches more clearly.
- Tummy placement. A tummy that reaches up close to the eyes makes the face look bigger and cuter.
- Make him an ornament. Use DK yarn and a 2.5 mm hook to make him about 6 cm tall, then add a loop through the hat.
- Penguin family. Make one in worsted and one in DK for a parent and baby set, which is a great seller at craft markets.
FAQ
Is this penguin hard to make?
No. The body is one piece, and the other parts are tiny. If you’ve made a ball before, you can make this penguin.
How do I make the tummy lie flat?
If it ruffles, your stitches are too loose. Go down half a hook size, or skip one of the increases in R2.
Can I make a penguin without the hat?
Yes. He’s complete without it, so you can make him for winter all year long.
Can I sell the penguins I make?
Yes, finished items are fine to sell. Please credit Crochet By Luma Art and don’t share or resell the pattern.
Make the whole winter crew with the Chibi Snowman and the Mini Christmas Tree, and save this pattern to your Pinterest board so you don’t lose it!
Cover photo: Inspiration photo by Ellie Burgin on Pexels